বিশ্বজোড়া রাসেলের কাজ
তৌহিদী হাসান |প্রথম আলো। তারিখ: ২৩-০১-২০১৩


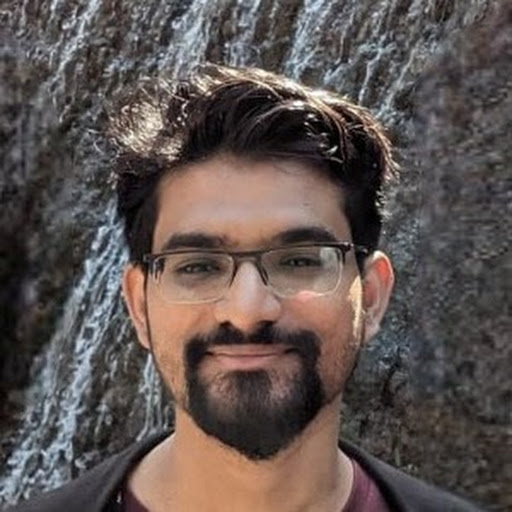
রাসেল আহমেদ
ছবি: সংগৃহীত
ধানখেতের পাশে কয়েকজন যুবকের হাতে ল্যাপটপ। একমনে তাঁরা কাজ করে চলেছেন। তাঁদের পেছনে দাঁড়িয়ে রাসেল আহমেদ। কেউ একটু সমস্যায় পড়লেই কীভাবে সমাধান করা যায়, তা দেখিয়ে দিচ্ছেন তিনি। ভেড়ামারা ডিগ্রি কলেজের স্নাতক শেষ বর্ষের ছাত্র রাসেল। শূন্য থেকে শুরু করে আকাশছোঁয়ার দিকে এগিয়ে যাচ্ছেন এই যুবক। শুধু একা কাজ করে সফল হচ্ছেন, ভালো আয় করছেন, এমন নয়; গ্রামের অনেককেই নিজের কাজের সঙ্গে যুক্ত করেছেন। শিখিয়ে-পড়িয়ে তাঁদের দিচ্ছেন ভালো আয় করার পথের সন্ধান।
এখন প্রতি মাসে রাসেল কুষ্টিয়ার ভেড়ামারা উপজেলার ফারাকপুর গ্রামে বসেই বিদেশের আউটসোর্সিং কাজ করে দেড় থেকে দুই লাখ টাকা আয় করছেন। কীভাবে তা সম্ভব হলো? জানা যাক বিস্তারিত।
২০০৯ সালে গ্রামের বাজারে একটি দোকানে হঠাৎ কম্পিউটার দেখে থমকে দাঁড়ান রাসেল। প্রতিদিন কলেজ ছুটির পর সেই আশ্চর্য বস্তুটির কাছে হাজির হন। দেখতে দেখতে তাঁর মনে ইচ্ছা জাগে, কম্পিউটার শিখতে হবে।
রাসেলের জন্ম ১৯৮৯ সালে। বাবা মকবুল হোসেন পেশায় দরজি, মা রেহানা পারভীন গৃহিণী। মা-বাবা আর তিন ভাইবোনের সংসার চলে কায়ক্লেশে। কিন্তু কম্পিউটার তত দিনে জাদু করেছে রাসেলকে। তিনি বায়না ধরেন, পড়ালেখার পাশাপাশি কম্পিউটারের কাজ শিখবেন। ছেলের ইচ্ছা পূরণ হয় মায়ের বিয়ের কানের দুল বিক্রি করে। একটি কম্পিউটার প্রশিক্ষণকেন্দ্রে ভর্তি হয়ে যান রাসেল আহমেদ। মাসিক ১০০ টাকা বেতনে একটি চাকরিও জুটিয়ে ফেলেন।
কাজ করতে করতেই জানতে পারেন ইন্টারনেট থেকে আয় করা যায়। শুরু করেন ওয়েব ডিজাইন শেখা। একদিন পত্রিকার মাধ্যমে জানতে পারেন উপজেলা ই-সেন্টারে উদ্যোক্তা নিয়োগ হবে। সেখানে আবেদন করেন, চাকরিও পেয়ে যান। ভেড়ামারা উপজেলা নির্বাহী কর্মকর্তা রাজিবুল ইসলামের সহযোগিতায় অনলাইনে আয় সম্পর্কে আগ্রহী হন। এ সময় খুলনাতে এক প্রশিক্ষণে গিয়ে আউটসোর্সিংয়ের কাজ পাওয়ার ওয়েবসাইট ওডেস্ক ডট কমে তিনি অ্যাকাউন্ট খোলেন। একটা কাজও পেয়ে যান। কাজটি ঠিকঠাক করায় আরও কাজ আসতে থাকে। প্রথম মাসেই আয় ১৫ হাজার টাকা। সেটা ২০১০ সালের শেষের দিকের কথা।
এরপর আর পেছন ফিরে তাকাতে হয়নি রাসেল আহমেদকে। আউটসোর্সিং কাজের জন্যই ইংরেজি ভাষা শিখতে থাকেন, সঙ্গে ওয়েব ডিজাইন, ওয়েব প্রোগ্রামিং।
গত অক্টোবর মাসে রাসেলের আয় হয়েছে দুই লাখ টাকা। ‘ডিজাইনিংওয়ে’ নামে নিজের একটি কোম্পানি তৈরি করেছেন। এই কোম্পানি বিভিন্ন বিদেশি গ্রাহকের কাজ করে দেয়। ওডেস্কের মতো ওয়েবসাইটের মাধ্যমে না গিয়ে সরাসরিও অনেক কাজ পান তিনি। রাসেল বলেন, ‘আমি বাংলাদেশি হিসেবে গর্ববোধ করি। এত সীমাবদ্ধতা থাকার পরও আমি আমার কোম্পানিতে বাংলাদেশি মানুষদের প্রাধান্য দিচ্ছি।’
ভেড়ামারার গ্রামে বসে রাসেল এখন কানাডার মেশিন রিসার্চ অ্যান্ড সফটওয়্যার ফাউন্ড্রি লিমিটেডে চাকরি করেন। বেতন পান মাসে দেড় লাখ টাকা। যুক্তরাষ্ট্রের এটি প্রতিষ্ঠানে খণ্ডকালীন চাকরিও করেন। অস্ট্রেলিয়ার একজন উদ্যোক্তার সঙ্গে অংশীদার হয়ে চালাচ্ছেন একটি অনলাইন বিপণনপ্রতিষ্ঠান (ইয়োরমার্কেটিংসেলস)। রাসেলের অস্ট্রেলীয় অংশীদার স্থায়ীভাবে তাঁকে সে দেশে গিয়ে থাকা ও কাজ করার প্রস্তাব দিলেও হাসিমুখেই তা ফিরিয়ে দিয়েছেন তিনি। গ্রামের বাড়িতে ব্রডব্যান্ড ইন্টারনেট সংযোগ পেয়েছেন। ফলে আউটসোর্সিংয়ের কাজটি আরও গতি পেয়েছে। রাসেলের ভাষায়, ‘এ দেশের সুযোগ-সুবিধায় বড় হয়েছি, তাই বিদেশে যাব না। আমি আমার গ্রাম থেকেই দেশকে অনেক উঁচুতে নিয়ে যেতে চাই।’
অনলাইনে যে কেউ যেকোনো জায়গা থেকে যেন কাজ শিখতে পারেন, সে জন্য আর আর ফাউন্ডেশন (www.rrfoundation.net) নামে একটা ওয়েবসাইট তৈরি করেছেন রাসেল। উদ্দেশ্য, তথ্যপ্রযুক্তি শিক্ষার মাধ্যমে বেকারত্ব দূর করা। এই সাইটের ভিডিও টিউটোরিয়ালগুলো কম্পিউটারে নামিয়ে নিয়ে যে কেউ আউটসোর্সিং শিখতে পারবেন। পুরোটাই বিনা মূল্যে। এভাবেই নিজের গ্রামে থেকে রাসেল ছড়িয়ে পড়ছেন দেশময়, বিশ্বময়। দেশকে নিয়ে যাচ্ছেন আরও উঁচুতে।
আমিই বাংলাদেশ নিয়ে পরামর্শ ও তথ্য যোগাযোগ: ab@prothom-alo.info


.jpg)
.jpg)
.jpg)
.jpg)
.jpg)
(1).jpg)
.jpg)
.jpg)
.jpg)
.jpg)


 Many bloggers including some professional ones suggest to store Blogger images on services like


